background

Saturday, October 22, 2022

Super Easy Burp Cloth DIY


I have been making these super easy burp cloths for years to give as gifts. I actually have several different ways I make them, and all of them are well liked by the Mommies I have gifted them to. While making some for the grand-baby, I came up with my final, easiest, pattern. And, this method can be used for several variations of burp cloths. Before I get to it, I would like to share the evolution of how I got here.

As a former home daycare owner, I know the value of a good burp cloth. I would get so frustrated with the thin ones that are available now. They weren't big enough or thick enough, so you wound up with spit-up everywhere. I decided to come up with a better idea. When I ran out of burp cloths, I would start pulling out dish towels to use. Now they worked well! But dish cloths are not cute baby themed. I wanted to create some that were not only cute, but fairly cheap to make. For the first ones I made, I bought the cute bandanas from Hobby Lobby. These are less than $1 and super cute!! But... very thin. I thought of the dish cloths and found a super thin white towel at Walmart for very cheap. I simply cut the bandana in 1/2. Then cut a matching piece of the towel. I sewed them, right sides together and turned them right-side out. Then I sewed a narrow top stitch around, closing the hole. Some of these I left as is, and some I crocheted a border around. (I was going to share a photo with you, but I couldn't find one.)

These were super cute, and worked very well. But I did tire of working with a terry towel. When it is cut, it leaves little terry-babies EVERYWHERE!!! 

So then I started experiencing with flannel. At the time, most flannel was pretty thick. I could use it for the front and the back. As the years have went on, flannel has gotten thinner. So there is a need for batting of some sort with thin flannel. 

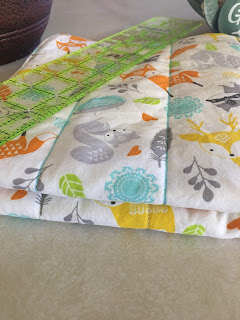
I still love to work with flannel the best, but sometimes, I want to work with a cute cotton fabric print that I find. I found this print in a "fat quarter" at Walmart and it was perfect for my grand-baby's woodland animal theme. I knew I would have to use a towel with this because it is so thin.

Using "Fat Quarters" for burp cloths are perfect, because you can cut one in half and have both sides to make one burp cloth. I used a thin towel for batting and sandwiched it between the two halves of the fat quarter. They turned out adorable, but like I said, I don't like those terry-babies!!!  I made 2 from this fabric. They are SUPER THICK!


I didn't want to make any more of these... so I decided to use some flannel I had ordered from JoAnn's Fabric last year. Since I ordered it, I couldn't see it. Turns out, it is pretty thin. I have a old flannel sheet that has gotten thin in places that I was going to throw it away. I'm glad I didn't!! It made the perfect batting. I made 4 burp cloths with this flannel. 

You can use the measurements of this pattern to make the different versions of burp cloths I mentioned.  

Supplies:

1 Fat Quarter or cut 2 pieces of fabric 18"x10"
Thin flannel for batting (if main flannel is thin)
Thread
Cutting tool
Straight Edge

Pre-wash, dry and iron all fabrics. Lay fat quarter out and cut in half so that you will have 2 pieces of 18 x 10. I forgot to take a photo of the fabric I was using at this stage. Here is the cotton fabric:
(This is the Fat Quarter laid out.)

(Use a straight edge to cut the fabric right down the middle.)

Before you put the pieces together, you need to mark your lines. First, make your rounded corners. You can use anything to mark this, such as a plate. I used a fabric marker that washes out.
Then you will need to mark your quilting lines. I have a handy ruler that I used. Find the center of each end, then using a straight edge, draw a line right down the middle. Then move your straight edge over 2 in. and make another line. Repeat one more time, then do 2 lines on the opposite side of the center.


Next, layer the fabrics. If you are using thick flannel, simply layer wrong sides together. If you are needing a batting for thin fabric, just put the cut piece of batting between the two.


Now you need to pin the fabrics together. Start in the middle and pin between markings. Smooth the fabric from the middle to the outside, and pin again between the middle and the edge. Repeat for the other side.


Working from the center and going out, sew down each marking. I like to use my "walking foot" for this if I have a batting. It helps the fabrics not to pucker. Also, by starting with the quilting lines, you will avoid "puckers" at the bottom of the burp cloth! I found this out the hard way.


Remove pins. Now you will sew all the way around your burp cloth. Do not leave an opening. I used a 5/8" seam, but you can use whatever you are comfortable with. You will need at least a 1/2" edge all the way around. Be sure to use your curved lines on the corners as your guide when going around those.


When finished, trim those corners. Now for the fun part.. ok, maybe not so fun. Using your sharpest scissors, snip all the way around the burp cloth. Mine were about 1cm apart. BE VERY CAREFUL NOT TO CUT THROUGH YOUR SEAM, OR YOU WILL NEED TO RE-SEW IT!!


When finished, you will need to wash and dry the burp rags to fray those edges. This is where it gets UGLY. Sometimes, you need to do this step twice. Don't freak out when you get them out of the washer!!! There will be tiny threads EVERYWHERE. (You may need to wipe down the inside of your washer and will definitely need to clean your lint catcher in the dryer when you're finished!!) Also... don't freak out when you take them out of the dryer either!!

OMGoodness!!! Don't freak!!

 
I know, it looks like an epic fail, but I promise it's not!!! I took these bad boys outside and beat them against the fence and my son's bicycle for a little bit. Then I took my hand and closed it over the edge, then ran my hand all around the edge of each burp rag to help "pull" those tiny threads on out. I used a lint roller to remove what was left. I also ironed them (after I took this photo.. oops!).


Pretty easy!!! If you want a more polished look, follow this same pattern except you will stack your fabrics right-sides together, and the batting piece on top. Then you will sew around the edge 1st, leaving an opening to turn. Trim edges, turn inside out, and iron. Sew a narrow top-stitch around the edge, closing up the opening as you go. You will sew down each of the quilting lines last, going between the top-stitching. I honestly like this look better. But I needed fast and easy!! 
Here are all the ones I made in a comparison photo. The pink ones have NO batting. They are made with thick flannel.  The Mountain flannel fabric was thin, so it has the thin flannel batting. The woodland cotton print has the terry towel as a batting.


I hope you will try these out!! They work up pretty quick and as I said before, they make a wonderful gift. If you have any questions about this pattern, please shoot me an email: thewhimzb@gmail.com or comment on this post. I will be more than happy to help you out!!





Thursday, October 13, 2022

Autumn Favorites ~ PUMPKINS!!

 Autumn is my favorite season!! There are so many things that I love about it, that I thought I would share a few of my favorite things. One of my favorite things are PUMPKINS. I absolutely love all types of pumpkins. Real, fabric, crochet, wooden, etc.... 

I have tried several times to grow pumpkins. I have only had success growing the tiny Jack Be Little pumpkins. Any larger ones have succumbed to powdery mildew.😒


I have a few pumpkins that I made that I want to share with you!


My friend Regina (who is also super crafty) had made some fabric pumpkins for a craft fair we did together years ago and I fell in love with these! These pumpkins are so very easy to sew. The website I got my pattern from is no longer available. But I did find another one that is the same here. It is very well written, with good photos to follow! I found some branches for some of my stems. On others, I just tied the jute twine at the top.


Something new I made this year were these adorable crochet pumpkins!!! I found this pattern on Pinterest and then I found the perfect orange yarn at the Dollar Tree. The first one I made, I got lost on counting my rows. I don't even know how many rows I made. I only realized something was wrong when I was trying to pull it closed and was really worried my yarn would break!! But I finally got it shut and I love how it turned out! 

For the stem, I did this:

  • MR 4.  
  • SC x4
  • 2x around (8)
  • SC x8
  • 1sc, 2sc around (12)
  • SC x 12

Only follow this pattern until you get to the size you need, then sew it onto your stuffed pumpkin.

For the leaf, I found a pattern here that is on an adorable hat. I love this pattern!!! The first crochet pumpkin hat I made was the one below... and it is NOT as cute. But.... it was so easy! 

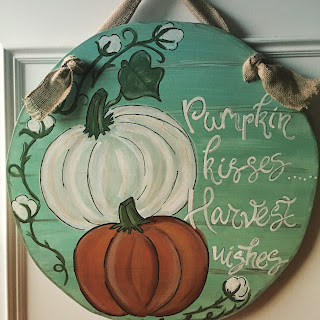
Another project I would like to share with you is this door hanger. I saw this on Pinterest and fell in love with the saying and the colors!!! Basically, I just copied it from the picture. I used Canva to design the words, printed them out, and used carbon copy paper to transfer them to the wood. Speaking of wood, this is just a piece of thin plywood that I made a circle on using a pencil, sting, and thumbtack, then cutting out with my jigsaw. I used acrylic paints and sealed it using a spray matte sealer.


I even made a burlap pumpkin door hanger way back when burlap was all the rage. I just painted a pumpkin onto a folded piece of burlap. Cut the pumpkin out of both sides. Hot glued the edge, leaving a small opening. Stuffed with plastic grocery bags. Added a hanger and Voila! A not-as-cute-as-I-envisioned pumpkin door hanger. 😁


I hope you have enjoyed my pumpkins! Coming soon will be a post about my most favorite thing about Autumn...

Scarecrows!!


Friday, October 7, 2022

Two Woodland Themed Baby Showers

 I just wanted to share photos of my daughter's two baby showers she has had. One hosted by myself, and the other hosted by my long-time friend Regina. Hopefully these will inspire you to put your own twist on for an event!


This shower was hosted at The Gathering Place, which is an old school/church that has been converted into a venue. And it happens to be a part of my childhood! I love it's rich woods and old stones. It was perfect for the theme.

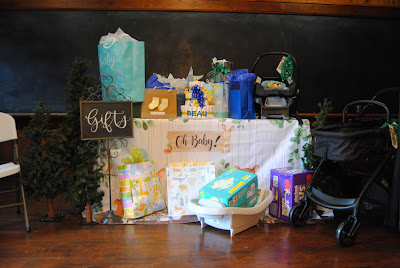
The second shower was held at a local community center. As you can see, I borrowed some of Regina's decorations. I only decorated these two areas... where they would sit and open gifts and the cake table. Our large family usually has "pot-luck" type showers since we are so large. This shower was a "finger-food potluck" and we had SO much yummy food!!!

Balloons and backdrop from Amazon.

(See how I made the cake topper and decorated the cake on a previous post.)


In the second photo, you will see on the right a can of birch bark pretzel sticks and in the basket are tiny goodie bags. 


The pretzel sticks were super easy!
Supplies: 
1 package candy coating (almond bark) vanilla
1 bag of pretzel sticks (I found mine at the Dollar Tree)
1 Hershey Bar

Melt half a package of candy squares in a microwave-safe tall mug according to package directions.
Dip pretzel sticks in mug and/or spoon coating up over the pretzel stick. Lay out on wax paper to dry
When finished, Melt Hershey bar in a small glass bowl. BE CAREFUL, it will scorch!
Use a butter knife and splatter melted chocolate over pretzel sticks. Flip and do the other side. 
This does get messy!!! I had chocolate splatter all over my bar! But it cleans easy. 
Then find a cute container to put them in and ENJOY!

The goodie bags were a project that I have been saving for YEARS to do. The bags are actually Playtex bottle bags from when my children were babies. I have been saving these this whole time for this purpose. Since the theme was woodland animals, I filled each bag with both regular and chocolate animal cookies. I made small tags using the Canva website and the images I purchased from Etsy, then punched them out using a circle punch from Hobby Lobby.  I just tied them with baker's twine and put them in a bushel basket I've had for awhile. 

We had several games to play:

Take a Wild Guess
A Diaper Raffle
Baby Boy Name Race
Baby Word Scramble
The Price is Right
Baby BINGO

When guests first came in, they had a chance to go ahead and get in on the games. We had a table set up (yes, that is a very short kid's lunch table) with the Take a Wild Guess game and the Diaper Raffle. I created posters on the Canva website using the clip art I had purchased on Etsy. I found these photo frames at the Dollar Tree. On that day, they did not have any regular photo frames. I decided to get these because I can use them at craft fairs for my WhimZ B business... get it.... BEE.... hexagon... beehive..... anyway....   I just had a small notebook with a pen beside a container of teddy grahams. Each person had to guess how many bears were in the container and write their guess on the paper beside their name. The winner (who gets the closest without going over) won the container! This container came from the Dollar Tree. The lid does not fit well, so I had to tape it on. I finished it off with jute twine and pip berry garland  also from the Dollar Tree.


I also had a Diaper Raffle going for anyone who brought diapers as gifts. I had cut pieces of paper into business card size and had a cute tin from the Dollar Tree ready to put their names in. The gift basket is behind. My daughter found the basket itself at a thrift store and I filled it with items from the Dollar Tree and the Dollar General and a candle from Walmart along with a Sonic gift card. I got my prizes for the other games from The Dollar Tree in the Dollar Plus aisle as well as candles from Ross. They are in the background.

Baby Boy Name Race
I made this just using each letter of the alphabet. Guests race to see who can fill in all the blanks... a boy name starting with each letter of the alphabet. First one finished (with legitimate names of course) wins!

Baby Word Scramble

I created this by combining different games I found on the internet. Guests have 2 minutes (or the first one finished) to unscramble these words that have to do with a baby. Either the first one finished or the one with the most correct wins.

The Price is Right

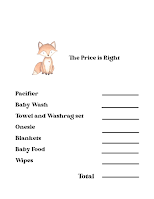
This was a fun game, and was one of my gifts. I bought each of these things at Walmart, then wrote down the price of each. I put each of these things in a basket. During the game, each of these were brought out and showed to the guests one at a time. The guests then had to guess how much each item cost. When finished, each guest must add their numbers to get a total. The one who is closest to your total without going over wins.

Baby Bingo
This is a family favorite. We usually play this while eating. Before the gifts are opened, each guest fills in their bingo card with things they think will be given. Items such as diapers, wipes, onesies, bibs, bottles, etc... During the gift opening, guests mark off anything that is opened. We always have a Bingo prize table set up that we all contribute to. It can be anything... clearance items, slightly used items, thrifted items, books, gifts that we could "re-gift", etc... We have something for everyone, men, women, and kids. Any time someone bingos, they just shout "BINGO!" and get up and get one thing off the table. We usually have enough prizes that we can go multiple times. Here is our prize table:

You can download my copy of this game to print here.

I hope this post has inspired your baby shower in some way! Later, I will share more amazing recipes that I used for this event. 


Wednesday, October 5, 2022

Woodland Animal Baby Shower Cake

 I so enjoyed putting together this baby shower for my soon-coming grandson!! As I shared in my previous post, I was having trouble deciding on the cake topper! My long-time friend, Regina, had also hosted a baby shower for my daughter, and we decided to share our resources. I had decided on a Woodland Animals theme from the very beginning since my daughter was planning on doing the baby's room with this theme. 

The first thing I bought was this backdrop banner from Amazon.  


I found the matching clip-art set on Etsy. Regina used the clip art to make her cake toppers. She just printed them on cardstock and attached them to bamboo skewers or dowels to stick in the cake. So cute!! (And by the way, she made that cake and it tasted AMAZING) 


I had wanted to do something similar, but couldn't think of anything that would look cute on a sheet cake. The shower I was planning was for my husband's side of our family and it is LARGE. Therefore, I had to opt for a sheet cake. 
I wanted to continue the birch tree look. I was also inspired by Regina's decorations. She used a lot of wood pieces, including wood slice rounds.


My first thought was a wood slice with printed animals and some eucalyptus greenery on it. 
But then..... I had a better idea!!
I would woodburn his name onto a wood slice, paint on some trees in the background and add a wooden animal onto it! 
That way, it could be used as the cake topper then it could be hung in his baby room.

I went over how I made the cake topper in this post.

Today, I will share how I pulled off the cake itself.

It was EASY. Thanks to Walmart bakery!!
I ordered a half sheet cake. Just a white cake with whipped frosting in white. 
I ordered it with chocolate piping around the bottom only. 
It was so funny when the Walmart employee brought it out to me and "let me look at it" to make sure my order was correct. She was very confused that there was NOTHING on it!! I assured her it was just as I ordered it. And, by the way, I ordered it online and it was so simple and very user friendly.


Here is how it looked when I got it home:


Plain and simple! Now for the magic...


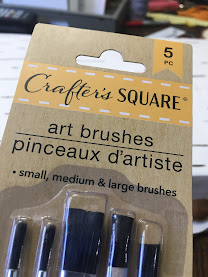
I ordered this Wilton brown icing gel from Walmart and picked up a cheap package of paint brushes from the Dollar Tree.
My original thought was to paint the lines onto the cake, but that idea was soon replaced.
I dug out my Pampered Chef stone scraper and used it instead of the paint brushes. I poured out a little gel onto a flat dish (that would wash well without staining the dish) and dipped the edge of my scraper into the gel. 


I just staggered different size lines using the scraper. I started in the middle where the topper would cover to test it out first. It was SO EASY. 

Then I decided to try to create some "knots" in the wood using the paintbrush. I wish I hadn't. I didn't care for it, but oh well....

Here is the finished cake. 


Walmart did mess up a bit on the cake. It was a little wonky in places. But it still worked. I didn't have to bake it or frost it! And it tasted amazing!!

To add the topper, I took 5 popsicle sticks and cut them with a utility knife to where they would stick out of the cake about a 1/2 an inch.  I traced the wood slice onto a piece of cardboard (a pizza box) and cut it out to use between the popsicle sticks and the topper. 
I did not assemble this until we got the cake to the shower. I stuck the popsicle sticks into the cake (rounded side down) in the center where the topper would go. I made a square and put one in the middle. Then I place the cardboard cut-out, then the plaque.
TA-DA!!


I love the way it turned out!! Later I will share more of the shower decorations with you :)


Monday, October 3, 2022

Woodburning Project for the coming Grandbaby!

 Have you ever tried woodburning? I can't even remember when I first started it. But I do know it is SO easy. All you need is a woodburning tool, the ability to trace, and patience!

When my daughter and I started planning a baby shower, I decided to go with a woodland theme. She had already started planning the baby nursery with bears and foxes, mountains and arrows, etc... so I wanted to continue that. 

When it came to the cake, I was having trouble finding a cake topper for a sheet cake. I found a lot of cute toppers for a round stacked cake, but not really anything that would look good on a large sheet cake. I knew I wanted the cake to have a birch tree look, but was lost on the topper.

I finally came up with an idea! I would buy a wood round with the bark still on the edge, and woodburn his name onto it. Then I would paint some trees in the background and add a little wooden animal to it. I like to use multi-media when creating things. Then, after the shower, it can be used as a decoration in his room.

Here is the final result!

This project was so easy. I began by creating my design in Canva. I use this free website all the time. I chose a poster template for the right size. I did his name first, then found the perfect tree. I saved it, printed it, then used carbon copy paper to trace it onto my wood.

I purchased the wood round from Walmart.

I bought a couple of little wooden animals from Hobby Lobby; an unfinished fox and a painted bear.
        
I absolutely loved the bear... but then again, I had a plan for the fox. I wanted to woodburn part of it, and paint part of it with a burnt orange color. The second photo is after I traced the design onto the wood and burnt it in. I did not burn the leaves. I could paint them on later and use my design as my guide. 
Next I painted the tree just using a matte white acrylic paint. I was careful to not paint over my burnt lines... just up to them. Next I burnt my fox and painted it. After the tree dried good, I decided to stain the wood. It was just too light for the look I wanted. 
I used this stain from Hobby Lobby and a small brush. I made sure to get my brush wet each time. I would paint on a little area of stain, then use a paper towel and rub off the excess. I did get some on my tree in a few places, but I just painted over it later. Next time, I will stain before painting!
After the stain dried, I burnt around the edge to give it the shading I wanted.
I then painted on the leaves using a matte acrylic paint in a sage green color. And then took the white I used for the treen and highlighted the leaves a bit.
Next I sealed the wood bark edge. I used what I had on hand which was Waverly Chalk Paint matte Varnish. I didn't want pieces of bark in the cake!
The bear wound up looking too dark next to the stained wood, so I decided to use the fox. So the last thing I did was glue him onto the plaque. I love how this turned out!! I will do a blog post later on how I did his cake and how I put the topper on.


I'm Moving!!

  In an effort to build my pattern designing business, I now have my own domain! Visit my NEW blog at:  thewhimzb.com   Come on over and see...