I have been making these super easy burp cloths for years to give as gifts. I actually have several different ways I make them, and all of them are well liked by the Mommies I have gifted them to. While making some for the grand-baby, I came up with my final, easiest, pattern. And, this method can be used for several variations of burp cloths. Before I get to it, I would like to share the evolution of how I got here.
As a former home daycare owner, I know the value of a good burp cloth. I would get so frustrated with the thin ones that are available now. They weren't big enough or thick enough, so you wound up with spit-up everywhere. I decided to come up with a better idea. When I ran out of burp cloths, I would start pulling out dish towels to use. Now they worked well! But dish cloths are not cute baby themed. I wanted to create some that were not only cute, but fairly cheap to make. For the first ones I made, I bought the cute bandanas from Hobby Lobby. These are less than $1 and super cute!! But... very thin. I thought of the dish cloths and found a super thin white towel at Walmart for very cheap. I simply cut the bandana in 1/2. Then cut a matching piece of the towel. I sewed them, right sides together and turned them right-side out. Then I sewed a narrow top stitch around, closing the hole. Some of these I left as is, and some I crocheted a border around. (I was going to share a photo with you, but I couldn't find one.)
These were super cute, and worked very well. But I did tire of working with a terry towel. When it is cut, it leaves little terry-babies EVERYWHERE!!!
So then I started experiencing with flannel. At the time, most flannel was pretty thick. I could use it for the front and the back. As the years have went on, flannel has gotten thinner. So there is a need for batting of some sort with thin flannel.
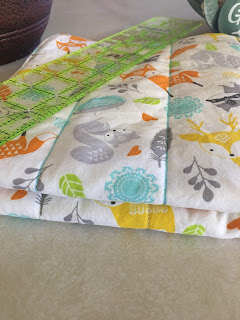
I still love to work with flannel the best, but sometimes, I want to work with a cute cotton fabric print that I find. I found this print in a "fat quarter" at Walmart and it was perfect for my grand-baby's woodland animal theme. I knew I would have to use a towel with this because it is so thin.
Using "Fat Quarters" for burp cloths are perfect, because you can cut one in half and have both sides to make one burp cloth. I used a thin towel for batting and sandwiched it between the two halves of the fat quarter. They turned out adorable, but like I said, I don't like those terry-babies!!! I made 2 from this fabric. They are SUPER THICK!
I didn't want to make any more of these... so I decided to use some flannel I had ordered from JoAnn's Fabric last year. Since I ordered it, I couldn't see it. Turns out, it is pretty thin. I have a old flannel sheet that has gotten thin in places that I was going to throw it away. I'm glad I didn't!! It made the perfect batting. I made 4 burp cloths with this flannel.
You can use the measurements of this pattern to make the different versions of burp cloths I mentioned.
Supplies:
1 Fat Quarter or cut 2 pieces of fabric 18"x10"
Thin flannel for batting (if main flannel is thin)
Thread
Cutting tool
Straight Edge
Pre-wash, dry and iron all fabrics. Lay fat quarter out and cut in half so that you will have 2 pieces of 18 x 10. I forgot to take a photo of the fabric I was using at this stage. Here is the cotton fabric:
 |
| (This is the Fat Quarter laid out.) |
 |
(Use a straight edge to cut the fabric right down the middle.)
|
Before you put the pieces together, you need to mark your lines. First, make your rounded corners. You can use anything to mark this, such as a plate. I used a fabric marker that washes out.
Then you will need to mark your quilting lines. I have a handy ruler that I used. Find the center of each end, then using a straight edge, draw a line right down the middle. Then move your straight edge over 2 in. and make another line. Repeat one more time, then do 2 lines on the opposite side of the center.
Next, layer the fabrics. If you are using thick flannel, simply layer wrong sides together. If you are needing a batting for thin fabric, just put the cut piece of batting between the two.
Now you need to pin the fabrics together. Start in the middle and pin between markings. Smooth the fabric from the middle to the outside, and pin again between the middle and the edge. Repeat for the other side.
Working from the center and going out, sew down each marking. I like to use my "walking foot" for this if I have a batting. It helps the fabrics not to pucker. Also, by starting with the quilting lines, you will avoid "puckers" at the bottom of the burp cloth! I found this out the hard way.
Remove pins. Now you will sew all the way around your burp cloth. Do not leave an opening. I used a 5/8" seam, but you can use whatever you are comfortable with. You will need at least a 1/2" edge all the way around. Be sure to use your curved lines on the corners as your guide when going around those.
When finished, trim those corners. Now for the
fun part.. ok, maybe not so fun. Using your sharpest scissors, snip all the way around the burp cloth. Mine were about 1cm apart.
BE VERY CAREFUL NOT TO CUT THROUGH YOUR SEAM, OR YOU WILL NEED TO RE-SEW IT!!
When finished, you will need to wash and dry the burp rags to fray those edges. This is where it gets UGLY. Sometimes, you need to do this step twice. Don't freak out when you get them out of the washer!!! There will be tiny threads EVERYWHERE. (You may need to wipe down the inside of your washer and will definitely need to clean your lint catcher in the dryer when you're finished!!) Also... don't freak out when you take them out of the dryer either!!
 |
| OMGoodness!!! Don't freak!! |
I know, it looks like an epic fail, but I promise it's not!!! I took these bad boys outside and beat them against the fence and my son's bicycle for a little bit. Then I took my hand and closed it over the edge, then ran my hand all around the edge of each burp rag to help "pull" those tiny threads on out. I used a lint roller to remove what was left. I also ironed them (after I took this photo.. oops!).
Pretty easy!!! If you want a more polished look, follow this same pattern except you will stack your fabrics right-sides together, and the batting piece on top. Then you will sew around the edge 1st, leaving an opening to turn. Trim edges, turn inside out, and iron. Sew a narrow top-stitch around the edge, closing up the opening as you go. You will sew down each of the quilting lines last, going between the top-stitching. I honestly like this look better. But I needed fast and easy!!
Here are all the ones I made in a comparison photo. The pink ones have NO batting. They are made with thick flannel. The Mountain flannel fabric was thin, so it has the thin flannel batting. The woodland cotton print has the terry towel as a batting.
I hope you will try these out!! They work up pretty quick and as I said before, they make a wonderful gift. If you have any questions about this pattern, please shoot me an email: thewhimzb@gmail.com or comment on this post. I will be more than happy to help you out!!


.png)
.png)

No comments:
Post a Comment