I so enjoyed putting together this baby shower for my soon-coming grandson!! As I shared in my previous post, I was having trouble deciding on the cake topper! My long-time friend, Regina, had also hosted a baby shower for my daughter, and we decided to share our resources. I had decided on a Woodland Animals theme from the very beginning since my daughter was planning on doing the baby's room with this theme.
The first thing I bought was this backdrop banner from Amazon.
I found the matching clip-art set on Etsy. Regina used the clip art to make her cake toppers. She just printed them on cardstock and attached them to bamboo skewers or dowels to stick in the cake. So cute!! (And by the way, she made that cake and it tasted AMAZING)
I had wanted to do something similar, but couldn't think of anything that would look cute on a sheet cake. The shower I was planning was for my husband's side of our family and it is LARGE. Therefore, I had to opt for a sheet cake.
I wanted to continue the birch tree look. I was also inspired by Regina's decorations. She used a lot of wood pieces, including wood slice rounds.
My first thought was a wood slice with printed animals and some eucalyptus greenery on it.
But then..... I had a better idea!!
I would woodburn his name onto a wood slice, paint on some trees in the background and add a wooden animal onto it!
That way, it could be used as the cake topper then it could be hung in his baby room.
I went over how I made the cake topper in this post.
Today, I will share how I pulled off the cake itself.
It was EASY. Thanks to Walmart bakery!!
I ordered a half sheet cake. Just a white cake with whipped frosting in white.
I ordered it with chocolate piping around the bottom only.
It was so funny when the Walmart employee brought it out to me and "let me look at it" to make sure my order was correct. She was very confused that there was NOTHING on it!! I assured her it was just as I ordered it. And, by the way, I ordered it online and it was so simple and very user friendly.
Here is how it looked when I got it home:
Plain and simple! Now for the magic...
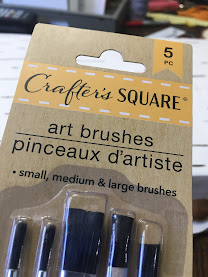
I ordered this Wilton brown icing gel from Walmart and picked up a cheap package of paint brushes from the Dollar Tree.
My original thought was to paint the lines onto the cake, but that idea was soon replaced.
I dug out my Pampered Chef stone scraper and used it instead of the paint brushes. I poured out a little gel onto a flat dish (that would wash well without staining the dish) and dipped the edge of my scraper into the gel.
I just staggered different size lines using the scraper. I started in the middle where the topper would cover to test it out first. It was SO EASY.
Then I decided to try to create some "knots" in the wood using the paintbrush. I wish I hadn't. I didn't care for it, but oh well....
Here is the finished cake.
Walmart did mess up a bit on the cake. It was a little wonky in places. But it still worked. I didn't have to bake it or frost it! And it tasted amazing!!
To add the topper, I took 5 popsicle sticks and cut them with a utility knife to where they would stick out of the cake about a 1/2 an inch. I traced the wood slice onto a piece of cardboard (a pizza box) and cut it out to use between the popsicle sticks and the topper.
I did not assemble this until we got the cake to the shower. I stuck the popsicle sticks into the cake (rounded side down) in the center where the topper would go. I made a square and put one in the middle. Then I place the cardboard cut-out, then the plaque.
TA-DA!!
I love the way it turned out!! Later I will share more of the shower decorations with you :)


.png)

.png)
No comments:
Post a Comment